Photos
For a photo to pixel art conversion, crop to the subject, use 64 blocks or more and turn on dithering so skin, skies and shadows blend smoothly.
Free Minecraft pixel art maker · No sign-up
Make Minecraft pixel art from any picture. This free pixel art generator converts an image or photo into a block-by-block grid you can zoom and print, lists the exact blocks to gather, and exports files for Litematica, WorldEdit and Bedrock.
Click a block to highlight where it goes.
Files are made in your browser; your image is never uploaded, and share links carry the design itself. Your latest design is kept in this browser so you can continue later. Litematica, WorldEdit and structure files work in Java Edition 1.20 and newer.
A real conversion with the settings above: the Pigscene painting, 64 pixels wide, matched against every block. Nothing was touched up by hand.

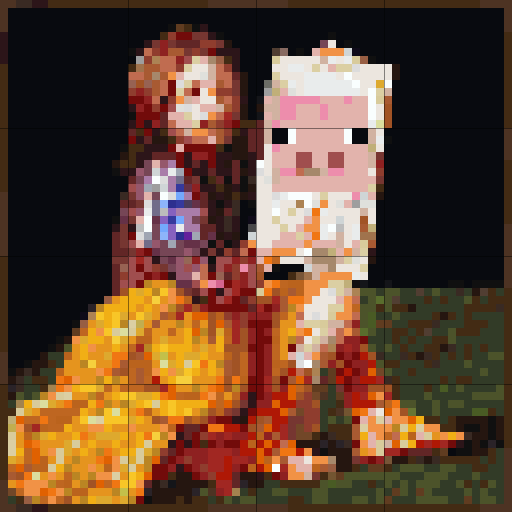
4,096 blocks · 83 block types
Minecraft pixel art is a picture built from blocks, where each block is one pixel. Players build it as a wall, lay it on the ground or turn it into map art, usually with wool, concrete and terracotta because those blocks have flat, bright colours. Pixel art in Minecraft ranges from a 16-block heart to murals hundreds of blocks wide.
Working out every block by hand is slow, so this Minecraft pixel art generator does it for you: it reads your picture, picks the closest block for each pixel and gives you a pixel art grid to follow. You can still edit single blocks, swap the palette and choose the size before you build.
Easy Minecraft pixel art ideas for beginners. Each template opens in the pixel art maker at one block per pixel, so you get the grid, the block list and the files straight away, and the blueprint PNG prints on one page.
Upload a PNG, JPG, WebP or GIF, paste one with Ctrl+V, or start from a template. Simple art with bold outlines and few colours turns into the cleanest builds.
Width is in blocks; height follows the picture. 32 to 64 blocks suits a wall in survival, 128 fills one map, and sprites look best at one block per pixel.
Wool and concrete give the brightest, flattest colours. Add terracotta for skin tones and browns, or tick Survival friendly to skip expensive blocks.
Try dithering for photos, remove the background, or cap the number of block types. Then fix details with the pencil, fill and eyedropper tools; undo works as usual.
Use the material list to collect blocks, then follow the row-by-row guide, or download a .litematic or .schem file and paste it with a mod.
Any picture works as a starting point. The converter shrinks it to the width you choose in blocks and matches every pixel to a block, so a photo, a drawing or a logo becomes Minecraft pixel art in a few seconds.
For a photo to pixel art conversion, crop to the subject, use 64 blocks or more and turn on dithering so skin, skies and shadows blend smoothly.
Flat colours and clear outlines convert almost perfectly. Leave dithering off and limit the palette to wool or concrete for clean edges.
Small pixel images already have one colour per pixel. Use one block per pixel and the Minecraft pixel art matches the original exactly.
Most builders use wool and concrete. Both come in 16 dye colours with no pattern on the texture, so every block reads as one clean pixel. Concrete is a little darker and more saturated than wool and does not burn; wool is easier to farm early in a survival world.
Terracotta adds 17 muted colours: tan, salmon, olive and many browns that wool and concrete lack. For natural scenes and skin tones a mix of all three gives the closest match. Planks, stone and ore blocks add more shades, but their textures are busier, so the picture looks rougher up close.
Pixel art is built to be looked at in the world, usually as a wall. The generator matches each block’s average texture colour.
Map art is built flat and looked at on a filled map, where every block shows as its map colour instead of its texture. Map mode matches those map colours. Flat map art uses one shade per colour and is easy to build; staircase map art raises or lowers each block against the one to its north to unlock lighter and darker shades, giving three times as many colours. A 128 × 128 build fills exactly one map.
Sprites, icons and signs. Quick to build in survival with a few stacks of wool.
Wall murals and logos. Enough detail for faces and lettering; plan for 30–100 stacks.
One full map. The usual size for map art and large statues of a picture.
Huge murals. Best pasted with Litematica or WorldEdit rather than built by hand.
Every design can be saved as a Minecraft pixel art grid: the Blueprint PNG download shows each block as a coloured square with numbered rows and columns every 8 blocks, and lines every 16 blocks so you can match chunk borders in game.
Print it, or keep it open on a second screen or phone, and tick off rows as you build. The CSV material list prints alongside it as a shopping list of blocks and stacks.
There are two ways to put a picture in Minecraft. A painting hangs one of the game’s built-in pictures, chosen by the space on the wall, and you cannot use your own image without a resource pack.
To show your own picture, build it as pixel art or map art. Upload the image here, pick a size, and follow the grid or paste the schematic. A 128-block-wide map art piece can then be held as a map or hung in an item frame like a framed picture.
Crop the picture tight before uploading and remove busy backgrounds; transparent parts of a PNG are left empty. Raise contrast a little for photos.
If the result looks noisy, turn dithering off, reduce the number of block types, or make it smaller before making it bigger. Dithering helps gradients such as skies and faces, and hurts flat cartoon art.
Build by hand from the grid and the material list, or place the whole picture at once with one of these files.
Shows a ghost of the picture in your Java world so you can build it block by block in survival, with a material list in game.
Put it in the WorldEdit schematics folder, then //schem load and //paste. Works with FAWE and Axiom too.
Load it with a structure block or /structure load. Builds wider than 64 blocks come as tiles with a placement guide.
Put it in a world’s generated/minecraft/structures folder and load it with a structure block or /place template. No mods needed.
Put it in a datapack’s function folder and run it to place every block with /fill and /setblock.
A printable build plan split into 32 × 32 pages with coordinates, a single blueprint PNG, and a spreadsheet of block totals for gathering in survival.
Upload a picture or choose a template, set the width in blocks, pick the blocks you want to use, then follow the grid and material list in game, or download a Litematica or WorldEdit schematic and paste it.
Yes. It runs entirely in your browser with no account, no watermark and no limit on downloads. Your images are never uploaded to a server.
For a wall in survival, 32 to 64 blocks wide is a good balance of detail and effort. Map art is 128 × 128 blocks per map. Sprite-style images look sharpest at one block per pixel; use the button under the width setting.
Wool and concrete, because their textures are flat and they come in 16 colours each. Terracotta adds muted tones. The generator lets you mix any of them, or choose single blocks if you only have certain colours.
Dithering scatters two block colours so that, from a distance, they blend into a colour you do not have. It makes photos and gradients look smoother but adds noise to cartoons and logos, so leave it off for those.
Choose Flat map art or Staircase map art under Build as. The picture is matched to map colours and laid flat, and a row of cobblestone is added on the north edge so the first row shows the right shade. Set the width to 128 for one map.
With Litematica, put the .litematic file in the schematics folder of your Minecraft directory and load it from the Litematica menu. With WorldEdit, put the .schem file in the WorldEdit schematics folder and use //schem load then //paste. Without mods, put the .nbt file in your world’s generated/minecraft/structures folder and use a structure block. On Bedrock, import the .mcstructure file with a structure block.
Yes. The block grid and material list work for both editions, and the .mcstructure download is made for Bedrock. Large builds are split into 64-block tiles because Bedrock structure blocks cannot load anything wider.
Yes. Upload the photo, choose 64 to 128 blocks wide and turn on dithering. Raising contrast slightly helps faces and landscapes read clearly from a distance.
Make your design, then choose Blueprint PNG under Download. It has numbered rows and columns and chunk lines every 16 blocks, sized to print on a single page.
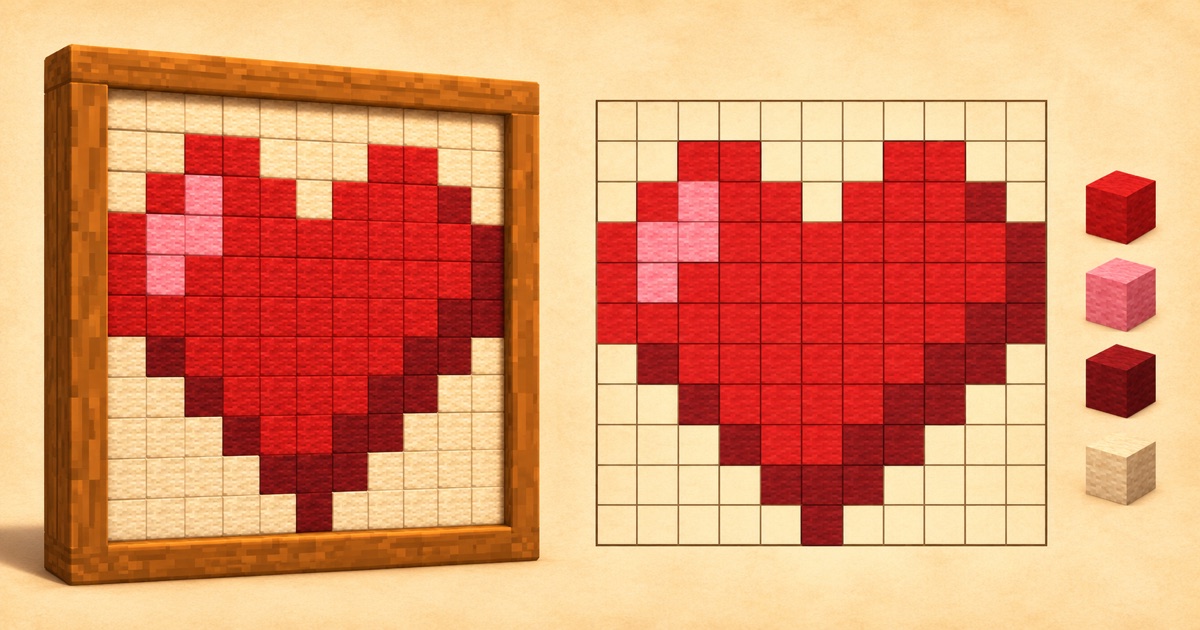
Hearts, stars, smiley faces, fruit, swords, pickaxes and gems are quick to build at 11 to 16 blocks wide. All of them are in the template gallery above.
Yes. Choose Start from a blank canvas, set the size, and paint with the pencil, fill and eyedropper tools using any of the 117 blocks. You can also edit any converted picture the same way.
Your latest design is kept in this browser automatically, so you can continue after closing the page. Copy share link puts the whole design, including your edits, into a link; nothing is uploaded and no account is needed.
Yes. Transparent pixels are left empty in pixel art mode, so you only build the subject. Map art cannot be transparent, so those areas become white.
Guides